The dreaded spam folder. One thing all businesses try to avoid when it comes to sending out emails. Winding up in the spam folder can drastically diminish your total number of email opens, which in turn affects the number of clicks back to your website. In a lot of email clients, such as Gmail, the spam folder is sometimes hidden underneath a drop-down menu. A lot of times emails end up in spam due to email authentication not being set up properly, or DNS changes were made and never updated. Today we will walk you through how to authenticate your domain for emails. This can help get your emails back in your customer’s inboxes, where they belong.
What is Email Authentication?
Nobody likes getting spam and ISPs are constantly working to reduce it by looking at the source of an email and trying to check to see if it is valid. Email authentication, also referred to as domain authentication or validation, refers to the process of better identifying the sending origin or domain so that ISPs can better route your email. This is a great technique to help prevent spoofing and phishing scams in case the email message appears to be from one domain, but it actually delivered from another.

In other words, email authentication allows your email marketing tool to send email on your behalf, but as your domain. For example, with MailChimp, it removes the default authentication information ( “via mcsv.net” or “on behalf of mcsv.net”) that shows up next to your campaign’s From name. You will want to use your own domain name for newsletters, both for deliverability and branding purposes.
Even though email authentication is not required, we typically have seen that those that don’t set it up end up with a large majority of their emails going straight to spam. Setting up email authentication is simply a matter of creating a few additional DNS records or uploading a file to your server using information provided from your email marketing tool. Don’t worry, we will guide you through the entire process further below.
4 Primary Email Authentication Methods
First, let’s dive into the four primary authentication methods that are used by ISPs.
1. DKIM / DomainKeys
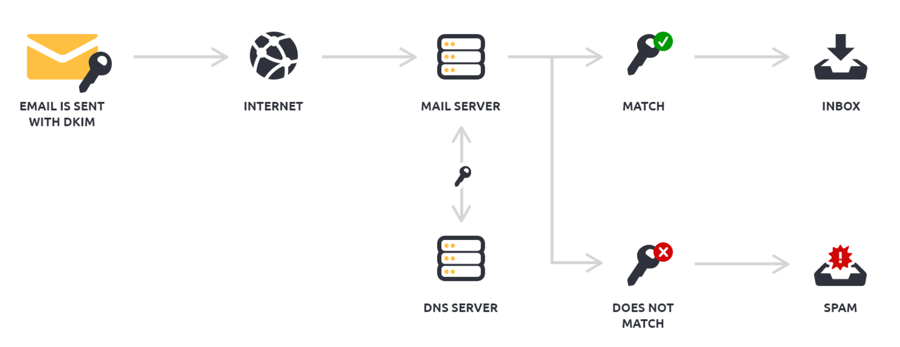
DKIM stands for DomainKey Identified Mail. According to the DKM website: “DKIM attaches a new domain name identifier to a message and uses cryptographic techniques to validate authorization for its presence. The identifier is independent of any other identifier in the message, such as the author’s From: field.” Various forms of validation can be used, such as a CNAME record or TXT record.
Below is an example of a DKIM record which MailChimp uses for authentication.
CNAME record: k1._domainkey.yourdomain.com
Value (resolves to): dkim.mcsv.net
And here is an example of a DKIM record with MailerLite using a TXT record.
TXT Name: ml._domainkey.yourdomain.com
TXT Value: k=rsa; p=MIGfMA0GCSqGSIb3DQEBAQUAA4GNADCBiQKBgQDdgIGns7EFVltvAkNNdbXD9KYSzAUNQky8POXwH6
Check out our tutorial on how to add DKIM records at Kinsta.
2. SPF
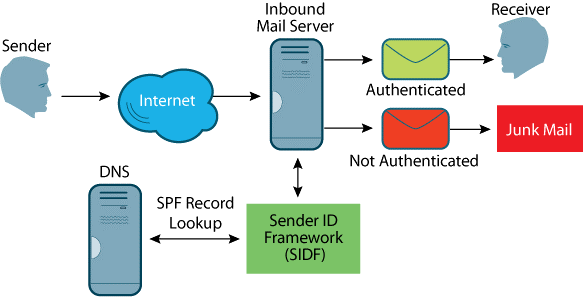
SPF stands for Sender Policy Framework. According to the SPF website: “SPF authenticates the envelope HELO and MAIL FROM identities by comparing the sending mail server’s IP address to the list of authorized sending IP addresses published by the sender domain’s owner in a “v=spf1″ DNS record.” Currently, these are in the form of a TXT record.
In other words, when you receive an email, your ISP uses the SPF record to check the IP address of the sender as well as the IPs of the website. If they match up, then your good to go. Large companies such as Google, Comcast, Verizon, Live.com, and Cox.net all use SPF records. Below is an example of an SPF TXT record which MailChimp uses for authentication.
v=spf1 include:servers.mcsv.net ?all3. Sender ID
Sender ID, developed by Microsoft, is sometimes lumped together with SPF. However, they are slightly different. While both validate email sender addresses and utilize the same method for doing so, the Sender ID checks against the purported responsible address (PRA), which is the visible sender address in the message. Sender ID was used primarily by Hotmail and Windows Live Mail, both of which no longer exist. It is however still used in solutions such as on-premise Exchange servers. There are some ISPs such as Comcast and AT&T which also utilize Sender ID. Many online email marketing tools won’t actually need anything from you pertaining to the Sender ID.
Here is an example of a Sender ID record.
v=spf1 include:servers.mcsv.net ?all spf2.0/pra include:servers.mcsv.net ?all4. DMARC
DMARC is a policy that allows a sender to indicate that their emails are protected by SPF and/or DKIM. These are not required, but they can help protect your customers and brand against phishing and spoofing attacks. DKIM and SPF are required before you can use DMARC.
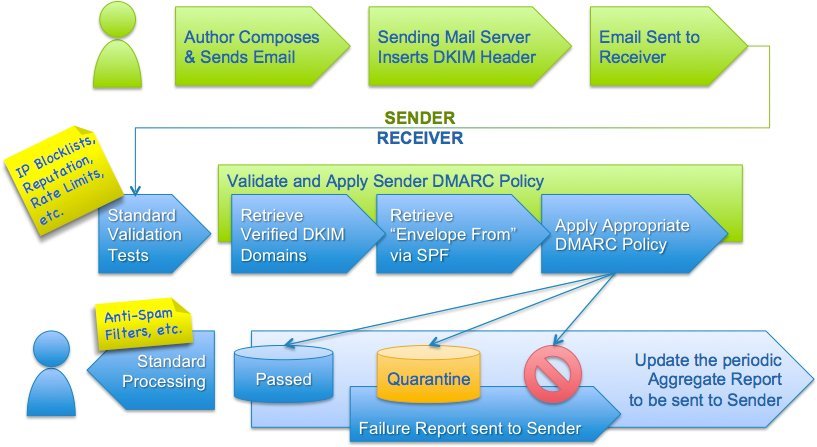
DMARC (Image source: DMARC.org)
Below is an example of a DMARC record using a TXT record.
v=DMARC1;p=reject;pct=100;rua=mailto:yourdomain.com
Read more about how to construct your DMARC resource record.
Confused Yet?
Don’t worry, just follow the steps below on how to setup email authentication. If you have already been using your email marketing tool for a long time, you still might want to double check to ensure the correct records are in place and validated. If you have change DNS providers recently you might need to set your records back up.
We had a client actually have this happen recently. They moved DNS providers and their newsletter was then going to the spam folder for almost a month before anyone realized it. This was due to missing authentication records. And here is what happened to their campaign statistics. By going straight to spam their open rate decreased by 4.79% from the previous month and their click rate decreased by 1.56%. That is why you don’t want to end up in the spam folder. You could miss out on free traffic and potential customers!

Statistics from campaign going to spam folder in April
How to Set up Email Authentication in MailChimp
Today we are going to walk you through how to set up email authentication in MailChimp, one of the most well known and widely used email marketing tools on the web. We use MailChimp ourselves here at Kinsta to deliver our weekly newsletter. The process below will be very similar no matter what email marketing solution you currently use.
Step 1
Log in to MailChimp and hover over your avatar in the top right. Click on “Account.”
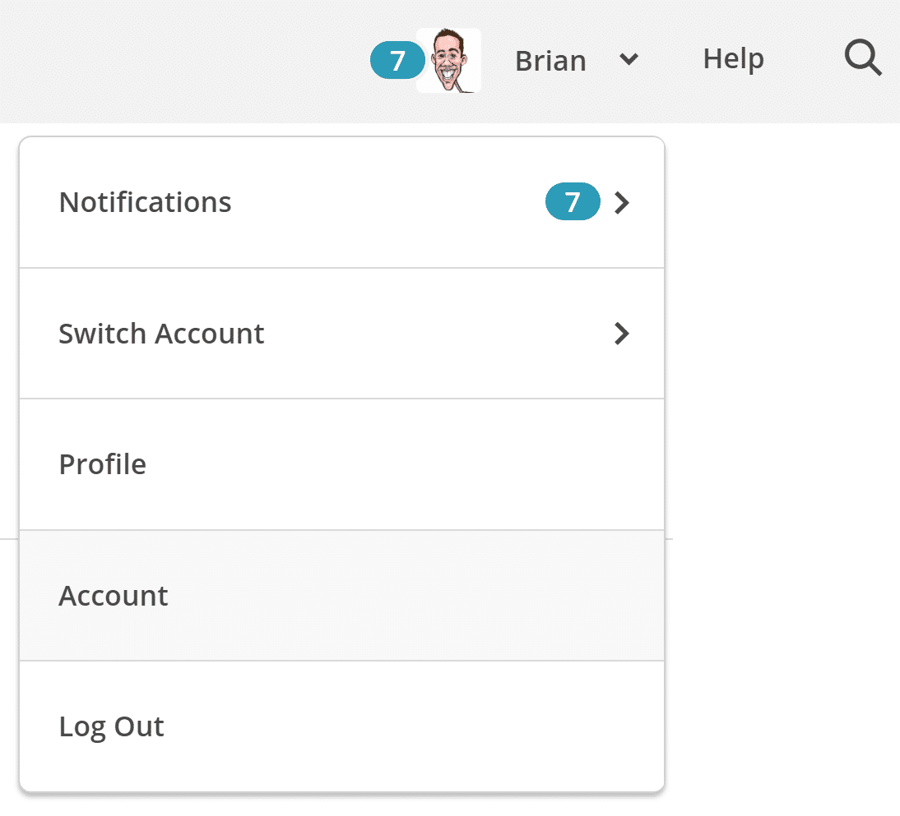
MailChimp account
Step 2
Click into “Settings” and then “Verified domains.” If you have never set this up you will want to click on “Verify a domain.” Otherwise, you will see a list of your current verified domains and green/red indicators to show you if they are currently validated.
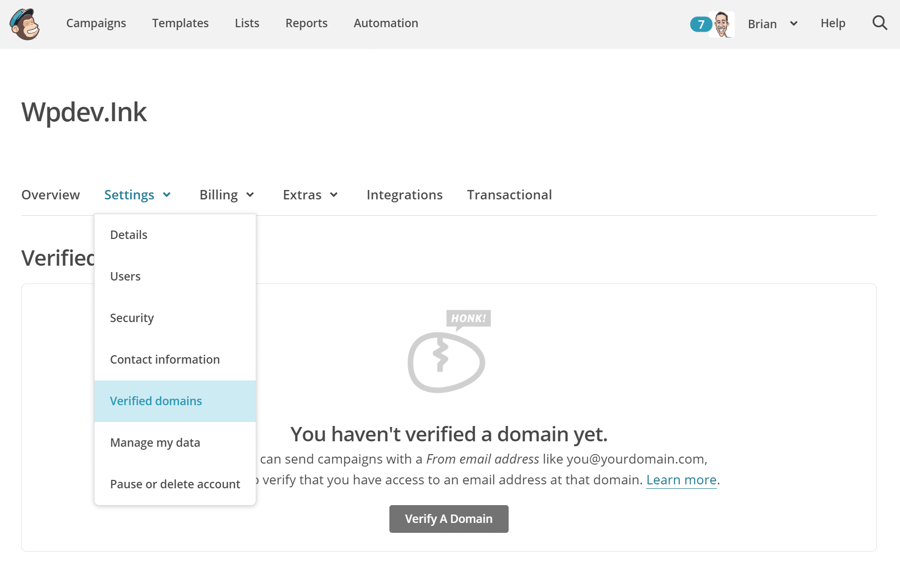
MailChimp verified domains
Step 3
Input an email that resides on the domain you are trying to verify. Then click on “Send Verification Email.” If you don’t have an email address on your domain, we recommend G Suite.
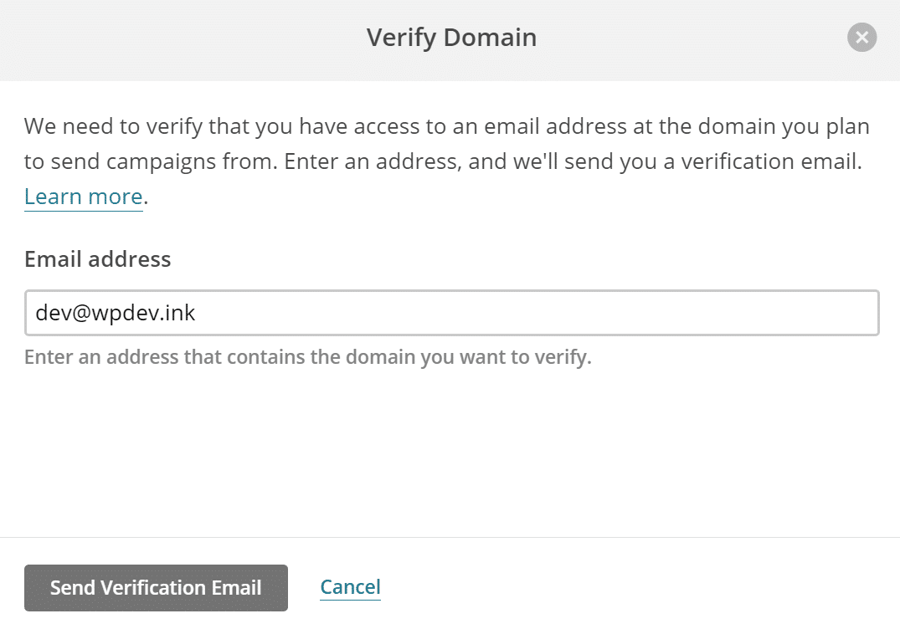
Send verification email
Step 4
Click the verification link you receive in your email or manually input the verification code.
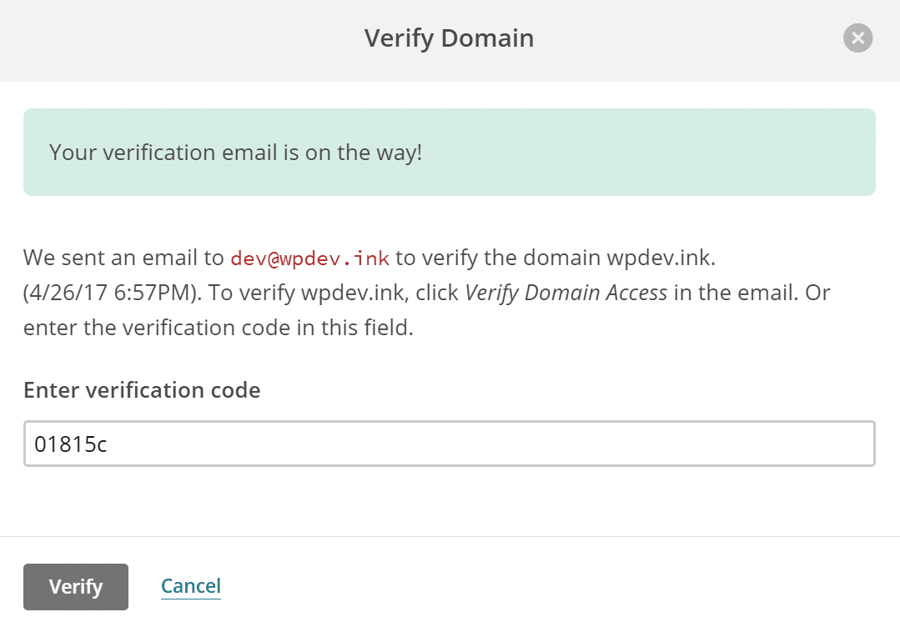
Verify domain
Step 5
MailChimp will then provide you with both the DKIM and SPF DNS records you will need to add to successfully complete your domain authentication. You add these with your DNS provider or domain registrar.
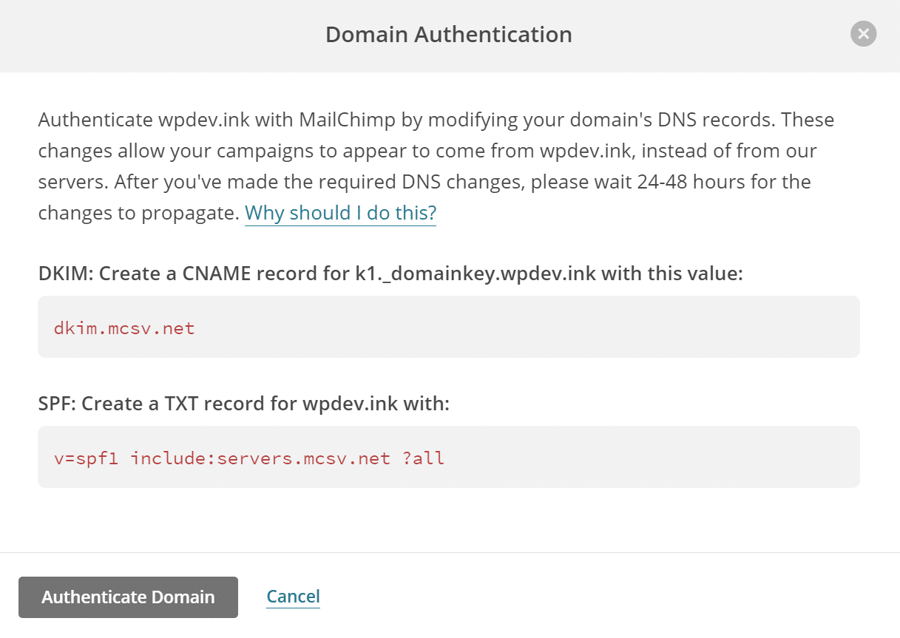
MailChimp domain authentication records
In our example, we are going to show you how to do it with Kinsta’s premium DNS. This again will be very similar whether you are using another 3rd party DNS provider or your domain registrar. In MyKinsta simply click into “Kinsta DNS” on the left-hand side. Then on your domain, click on “Manage.”
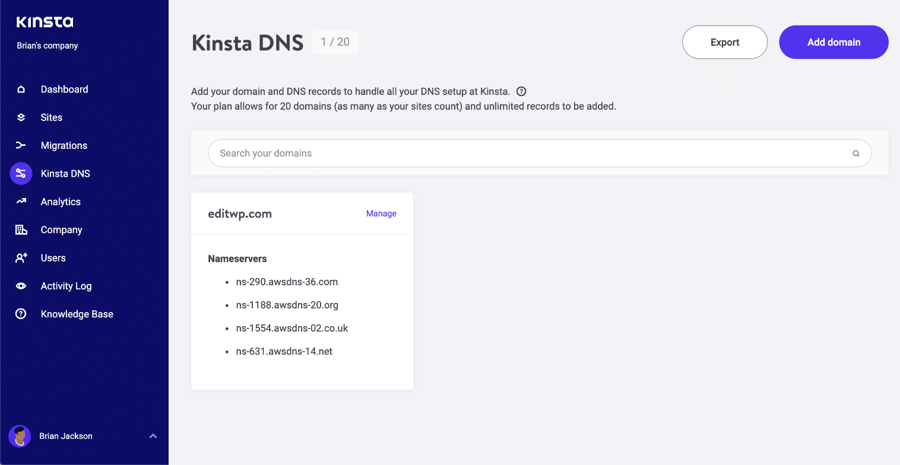
Manage DNS in MyKinsta
Step 6
Click on “Add a DNS Record” on the top.
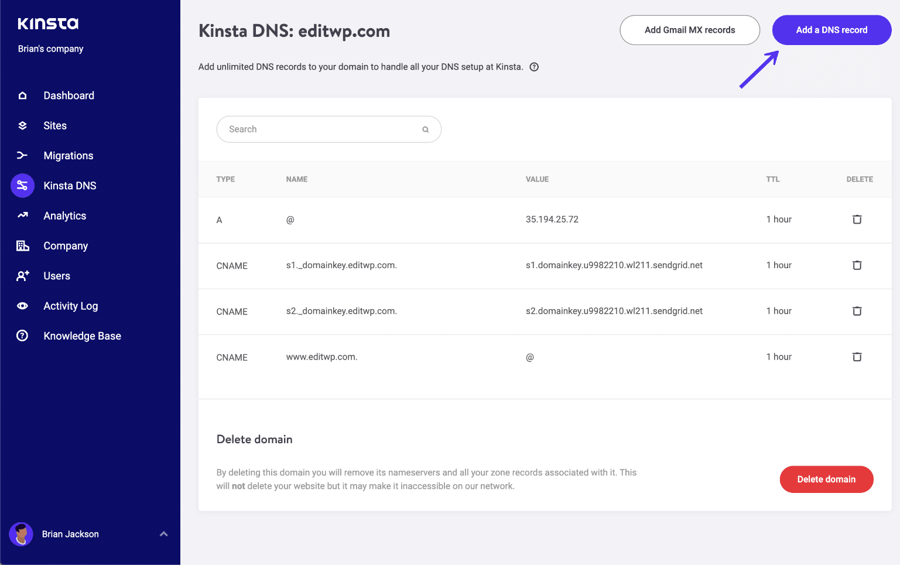
Add a DNS record
Step 7
We first need to add a CNAME record using the values from MailChimp. This is for the DKIM authentication method.
For the Type, choose CNAME from the drop-down. In the “Hostname” field we enter the following. Most DNS management tools will append the domain automatically. So be careful not to enter in the entire value that MailChimp gives you.
k1._domainkey
In the “Point To” field we enter the following:
dkim.mcsv.net
Then click on “Add DNS Record.”
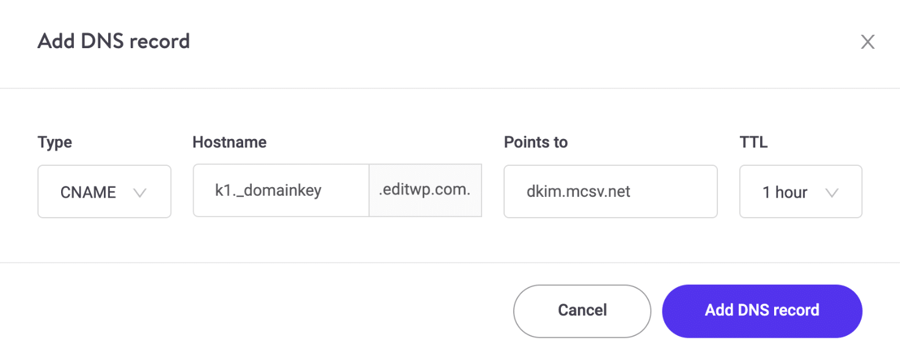
Add CNAME DKIM
Step 8
We now need to add a TXT record using the values from MailChimp. Click on “Add a DNS Record” again. This is for the SPF authentication method.
For the Type, choose TXT from the drop-down. Leave the “Hostname” field blank so it will simply use the root domain. Then in the “Content” field enter the following:
v=spf1 include:servers.mcsv.net ?all
Then click on “Add DNS Record.”
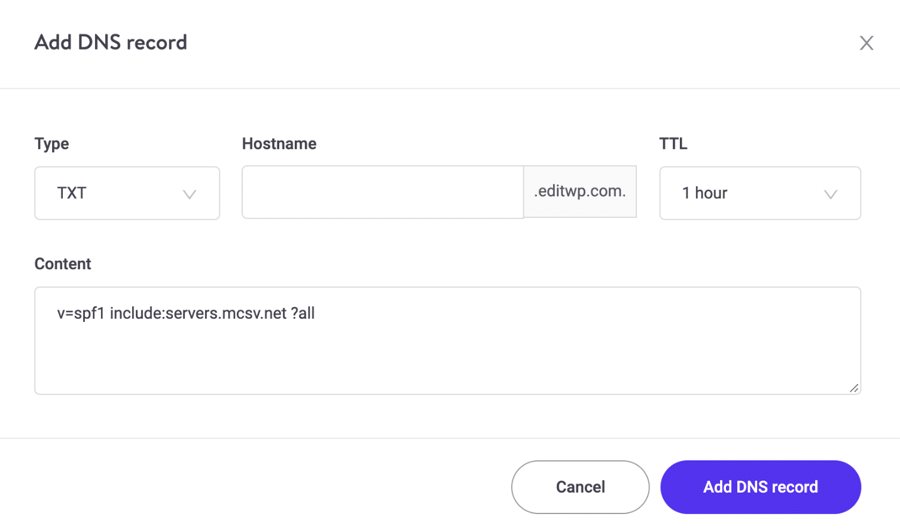
Add TXT SPF
Step 9
Back in MailChimp click on “Authenticate Domain.”
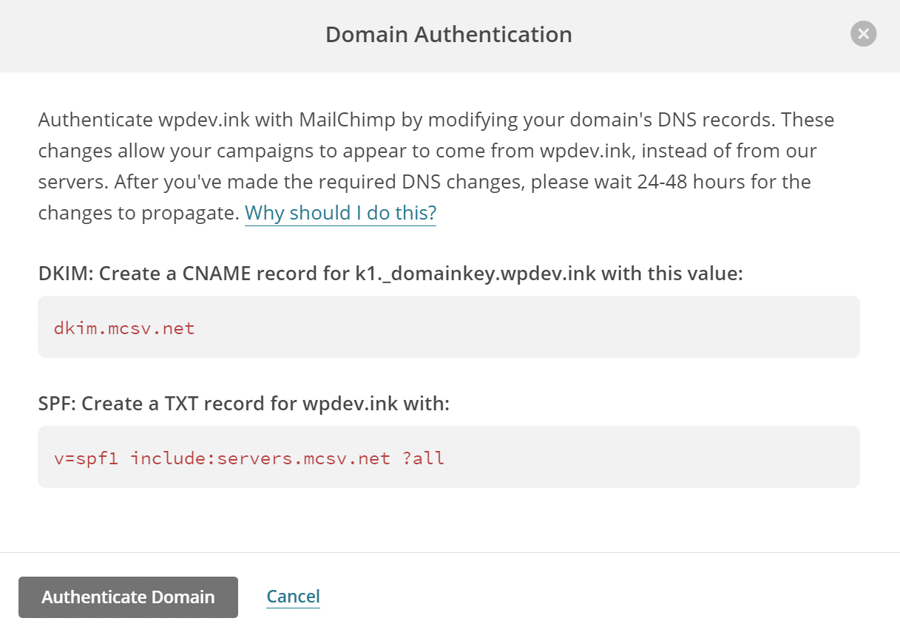
Domain Authentication
It can take a while for DNS records to propagate. If it doesn’t work right away you can come back and try later. Or you can use whatsmydns to verify the status of your records.
For example, you can input your CNAME to check on the current values across the globe.
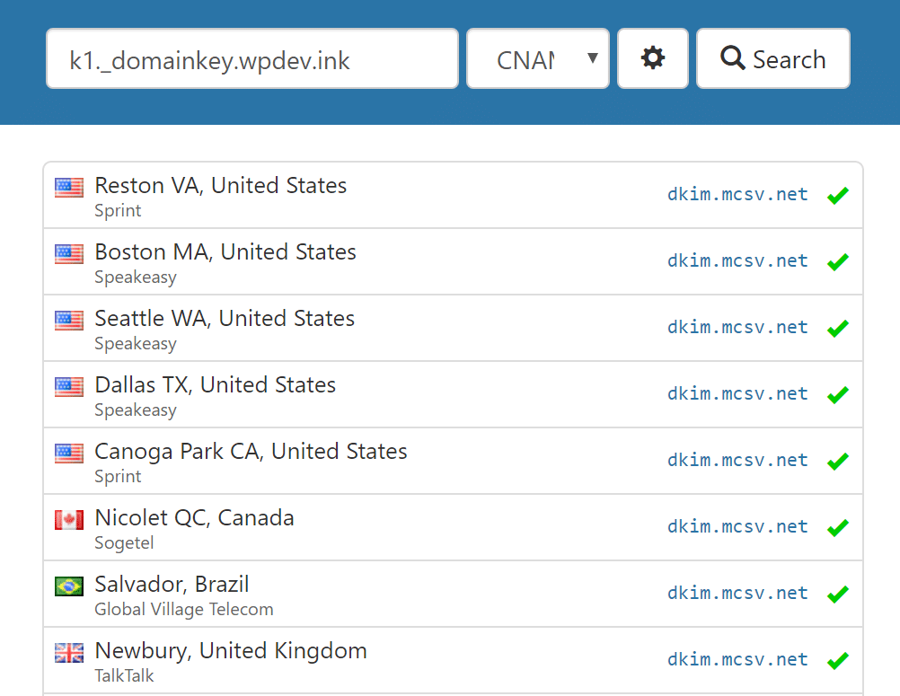
Verify DKIM record
You can also check your TXT record.
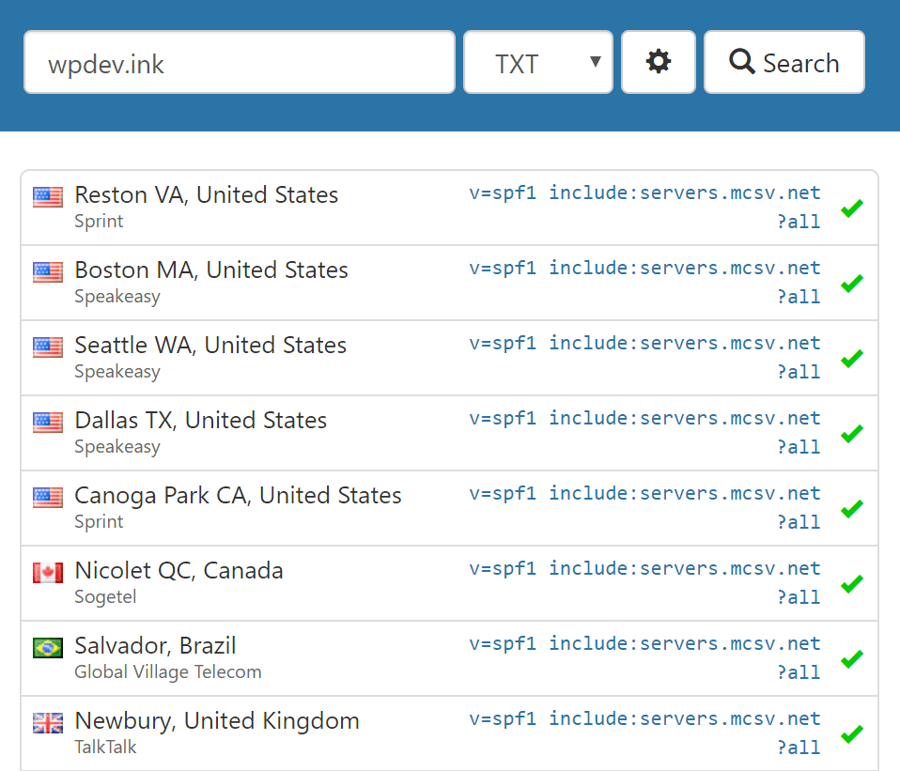
Verify SPF record
If all the records were entered correctly you should see green across the board.
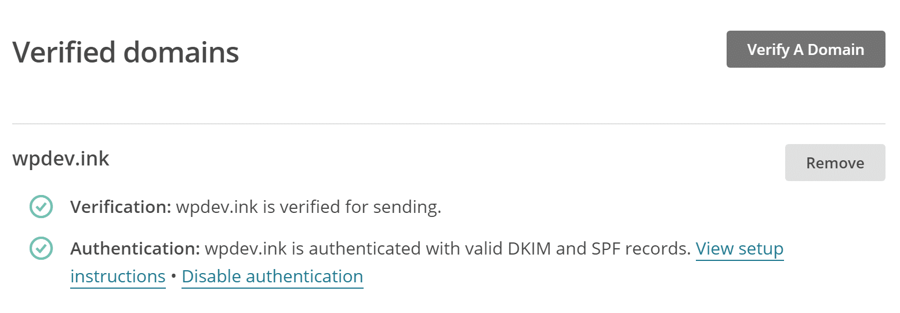
Verified domains
And that’s it! Your email and domain are now authenticated. It is also recommended that you change the From address on your list to your domain name.
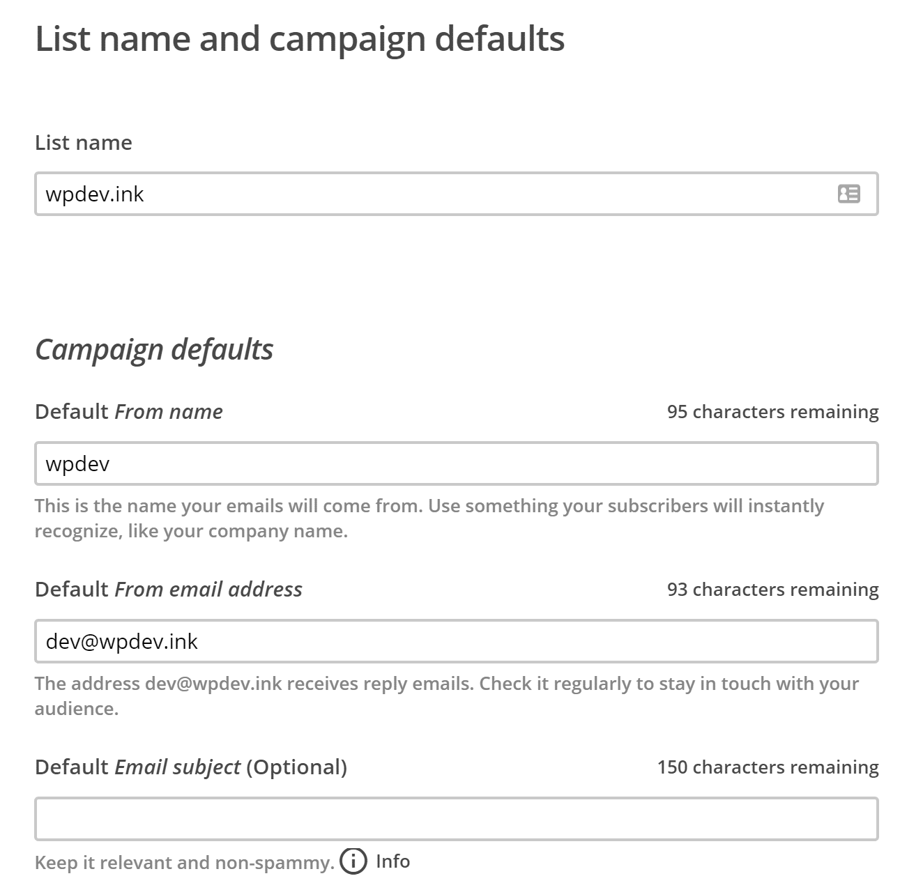
List name defaults
Summary
Hopefully, you know a little more now about email authentication, the different types of methods, and how to configure it within your email marketing tool. This will help you stay out of the spam folder and have a much higher chance of hitting your subscriber’s inboxes.
If you are looking for more handy email marketing tips make sure you read our guide 7 Email Marketing Tips to Increase Your B2B Sales.
What has been your experience with email authentication? Let us know below.
If you enjoyed this article, then you’ll love Kinsta’s WordPress hosting platform. Turbocharge your website and get 24/7 support from our veteran WordPress team. Our Google Cloud powered infrastructure focuses on auto-scaling, performance, and security. Let us show you the Kinsta difference! Check out our plans
